Lenovo Server RAM Upgrade Checklist for Better Performance and Scalability
Enterprise infrastructure faces relentless compute demands as data volumes expand and virtualization densities climb. For system administrators and infrastructure teams operating Lenovo platforms, conducting a strategic Lenovo server RAM upgrade provides one of the fastest paths to higher throughput, lower application latency, and increased workload density. Rather than replacing functional chassis and processors, expanding physical memory capacity allows organizations to scale operations smoothly while protecting their original capital investments.
Executing a server memory expansion requires methodical planning, precise hardware verification, and adherence to manufacturer population rules. At RAM Exchange, we assist infrastructure teams by supplying high-reliability, thoroughly tested enterprise memory that matches exact system specifications and keeps production environments operating at maximum efficiency.
Recognizing Critical Memory Bottlenecks in Lenovo Infrastructure
Before executing a hardware change, infrastructure teams must verify that memory limitations are truly driving system performance bottlenecks.
Primary Warning Signs of Memory Starvation
Elevated Swap and Paging Rates: The operating system frequently pushes active working sets to secondary NVMe or SATA storage arrays, causing CPU I/O wait spikes.
Virtual Machine Throttling: Hypervisors trigger memory ballooning drivers, compress active guest pages, and throttle guest operating systems to prevent total host crashes.
Out-of-Memory (OOM) Process Termination: High-throughput database engines or container pods terminate abruptly during peak transaction periods as host memory pools exhaust.
High CPU Idle Wait Times: Processors run at high utilization numbers not from complex computations, but from waiting for data transfers across constrained memory channels.
A comprehensive systems study published by the ACM Digital Library demonstrates that memory capacity saturation and suboptimal data locality in virtualized multitenant systems can cause performance slowdowns of up to 300 percent during peak concurrency. Expanding physical memory pools directly resolves these latency spikes and restores predictable compute response times.
Pre-Upgrade Assessment: Auditing Your Lenovo Server Architecture
A successful memory expansion begins with a comprehensive audit of your current hardware configuration. Lenovo ThinkSystem and legacy System x servers span multiple processor families, each with dedicated memory architectures.
Reviewing Processor Architecture and Channel Counts
Lenovo ThinkSystem V1 (Intel Xeon Scalable 1st and 2nd Gen): 6-channel architecture per CPU socket. Optimal multi-channel memory performance requires 6 or 12 DIMMs per processor.
Lenovo ThinkSystem V2 (Intel Xeon Scalable 3rd Gen Ice Lake): 8-channel architecture per CPU socket running DDR4 memory up to 3200 MT/s.
Lenovo ThinkSystem V3 (Intel Xeon Scalable 4th and 5th Gen): 8-channel architecture per CPU socket running DDR5 memory up to 5600 MT/s.
Lenovo ThinkSystem AMD Platforms (EPYC 7002, 7003, and 9004 Series): 8-channel (DDR4) or 12-channel (DDR5) architectures requiring symmetrical population across all channels.
Checking UEFI and BMC Firmware Baselines
Before sourcing new hardware for your Lenovo server RAM upgrade, check the Lenovo XClarity Controller (XCC) and system UEFI firmware versions. Updated firmware expands the supported memory matrix, adds support for newer DRAM die revisions, and optimizes signal margin tolerances.
To streamline compatibility verification and avoid deployment delays, RAM Exchange collaborates directly with enterprise engineers to map out verified, stable hardware configurations.
Hardware Compatibility and Module Selection Rules
Selecting compatible memory for Lenovo servers requires matching technical specifications down to the rank, voltage, and buffering type.
Memory Technology and Form Factor Rules
Registered DIMMs (RDIMMs): Standard enterprise memory featuring an onboard register for control and address lines. RDIMMs offer balanced latency and cost for moderate to high memory densities.
Load-Reduced DIMMs (LRDIMMs): Modules that buffer data and control lines to reduce bus loading. LRDIMMs support maximum capacity on DDR3 and DDR4 ThinkSystem platforms.
3D Stacked RDIMMs (3DS RDIMMs): High-density modules that stack silicon dies vertically using Through-Silicon Via (TSV) technology, enabling 128GB and 256GB configurations.
Essential Rules for Compatible Memory Selection
Never Mix DIMM Formats: Do not combine RDIMMs, LRDIMMs, and 3DS RDIMMs within the same server chassis. Mixing memory types prevents the system from completing its boot sequence.
Verify Voltage Compatibility: Ensure DDR4 modules operate at standard 1.2V and DDR5 modules operate at standard 1.1V.
Synchronize Speed and Latency: Match operating frequencies (such as 2933 MT/s, 3200 MT/s, or 4800 MT/s) across all populated slots to prevent the memory controller from downclocking to the lowest installed speed.
To browse certified, high-grade memory modules configured for enterprise server platforms, check the extensive inventory of RAM Exchange products.
Understanding Population Order and Channel Balancing
Correct slot population order ensures that your server activates full memory interleaving and balances traffic evenly across all integrated memory controllers.
The Channel Balancing Principle
Lenovo ThinkSystem motherboards assign multiple memory channels to each CPU socket. Populating all available channels provides 100 percent of native memory bandwidth. Leaving channels empty creates memory access bottlenecks and forces processor cores to stall while waiting for data.
Symmetrical Dual-Socket Configurations
In dual-processor servers, always maintain exact symmetry between Socket 1 and Socket 2:
Install identical memory capacities on both CPU sockets.
Install identical module counts on both CPU sockets.
Install identical rank configurations across corresponding channels.
An asymmetric configuration creates Non-Uniform Memory Access (NUMA) imbalances. If Socket 1 runs out of local memory, it must access memory assigned to Socket 2 across the UPI or Infinity Fabric bus, creating severe latency penalties.
Lenovo Slot Population Order
Lenovo motherboards color-code and label memory slots to indicate proper installation sequence:
Primary Slots (Blue/Dark Slots): Always install memory in the primary slot of each channel first (Slot 1 of Channel A, B, C, D, and so on).
Secondary Slots (Black/Light Slots): Install memory in the secondary slot of each channel only after populating all primary slots.
Economic and Operational Benefits: RAM Upgrades vs. Full Replacements
A server memory upgrade delivers clear economic and operational advantages compared to a full system replacement.
A datacenter energy and resource study released by the National Science Foundation (NSF PAR) highlights that memory subsystems account for up to 30 to 40 percent of total server power and cost footprints. The study emphasizes that unoptimized memory configurations cause severe system underutilization, dropping effective application throughput by factors of 8x to 25x. Upgrading memory unlocks stranded CPU capacity, restoring peak performance without the massive capital outlay of new server chassis.
Key Operational Advantages of a Memory Expansion
Extended Hardware Lifecycle: Adds 24 to 36 months of dependable service to existing ThinkSystem assets.
Reduced Software Licensing Fees: Avoids expensive per-core hypervisor, database, and OS licensing costs associated with purchasing new processors with higher core counts.
Minimized Maintenance Disruption: Eliminates complex operating system migrations, cluster rebalancing, and extensive rack re-cabling.
Environmental Sustainability: Lowers corporate e-waste generation by maximizing the lifespan of enterprise compute hardware.
How RAM Exchange Delivers End-to-End Enterprise Support
Executing a large-scale Lenovo server RAM upgrade requires reliable component availability, strict diagnostic standards, and efficient lifecycle management. RAM Exchange provides comprehensive hardware support tailored to enterprise infrastructure teams.
The RAM Exchange Service Lifecycle
Hardware Sourcing: Supplying high-grade DDR3, DDR4, and DDR5 modules ranging from 1GB to 128GB and beyond.
Rigorous Diagnostic Testing: Verifying SPD timings, thermal margins, and complete Tier-1 compliance under realistic server loads.
Comprehensive One-Year Warranty: Protecting every memory module with full replacement coverage.
IT Asset Disposition (ITAD): Providing secure buyback programs for decommissioned memory hardware.
Monetize Decommissioned Modules
When upgrading server fleets, your retired memory still holds significant value. Through our certified ITAD services, we help organizations turn excess hardware into working capital. If your team is replacing older DIMM modules during an infrastructure refresh, sell to us to offset upgrade costs and ensure responsible, certified recycling.
The Ultimate Step-by-Step Lenovo Server RAM Upgrade Checklist
Follow this chronological checklist to ensure a seamless, error-free upgrade:
Phase 1: Planning and Procurement
Run performance audits via OS monitoring tools to document current memory saturation, swap usage, and CPU I/O wait.
Identify exact server model, processor generation, and memory channel layout.
Determine current memory module type (RDIMM, LRDIMM, or 3DS RDIMM) to ensure complete compatibility.
Verify total target capacity and calculate balanced channel requirements across all sockets.
Order certified enterprise modules with identical speeds, timings, and voltages.
Phase 2: Pre-Installation Preparation
Update system UEFI and Lenovo XClarity Controller (XCC) firmware to the latest stable versions.
Schedule a maintenance window during off-peak hours.
Complete full system and virtual machine state backups.
Prepare an Electrostatic Discharge (ESD) safe workspace with grounding straps and antistatic mats.
Phase 3: Physical Installation
Power down the server, disconnect power cords, and remove the chassis cover and air baffling.
Inspect DIMM slots for debris or dust, clearing them with compressed dry air if necessary.
Follow Lenovo slot population rules by installing modules into the primary slots first.
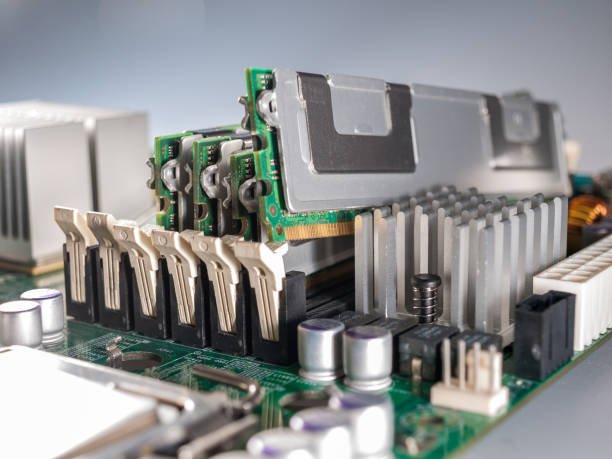
Apply even pressure on both ends of each DIMM until the side retaining clips snap into the locked position.
Reinstall air shrouds to guarantee proper thermal airflow across all memory banks.
Phase 4: Post-Installation Validation
Reconnect power and boot into the Lenovo XClarity interface.
Confirm the system recognizes the full physical memory capacity.
Check the System Event Log (SEL) for any correctable or uncorrectable memory initialization errors.
Run comprehensive hardware diagnostic tools (such as MemTest86+ or Linux stress utilities) under sustained workloads.
Reintroduce the server to the production cluster and monitor operational metrics.
Conclusion: Scale Your Infrastructure with Complete Confidence
Performing a strategic Lenovo server RAM upgrade allows IT teams to solve memory bottlenecks, maximize multi-channel throughput, and extend the lifespan of existing compute hardware. By systematically auditing server architecture, sourcing verified compatible modules, and following strict channel population guidelines, you ensure exceptional stability and long-term scalability for mission-critical applications.
If your team is planning an infrastructure expansion or needs assistance sourcing verified enterprise memory, contact the technical hardware specialists at RAM Exchange today.
Frequently Asked Questions
Will adding more RAM to my Lenovo server automatically increase performance?
Adding RAM improves performance if your workloads currently experience memory starvation, high swap activity, or hypervisor ballooning. It also boosts bandwidth if the upgrade fills unpopulated memory channels, enabling full multi-channel interleaving. If your server already has abundant free RAM and all channels are balanced, CPU or storage upgrades may be required instead.
Can I mix different memory capacities within the same channel?
Lenovo motherboards do not recommend mixing different capacities within the same channel. Doing so disrupts symmetric memory interleaving and reduces overall memory bandwidth. Always use identical module capacities and rank configurations across all populated channels.
How does memory population affect power and thermal management in Lenovo servers?
Populating dense memory modules increases total server power consumption and thermal output. Lenovo ThinkSystem chassis manage this through internal air baffles and automated fan curves controlled by the Baseboard Management Controller. Always ensure all airflow shrouds are correctly installed after upgrading memory to prevent localized thermal throttling.
What should I do if my Lenovo server fails to recognize a newly installed DIMM?
Power down the server, disconnect power cables, and reseat the unrecognized module firmly to ensure the retaining latches engage fully. Verify that you followed the proper slot population order and check the Lenovo XClarity System Event Log (SEL) for specific memory error codes. Inspect the slot for physical dust and verify that the system runs the latest UEFI firmware.