Lenovo Server RAM Upgrade: Everything You Need to Know Before Upgrading
Demanding modern enterprise workloads such as virtualization clusters, real-time analytics engines, and containerized microservices constantly place heavy pressure on system memory. When server compute nodes face severe memory pressure, performance drops, hypervisor swapping increases, and overall application response times degrade. Performing a Lenovo server RAM upgrade is the most practical, cost-effective way to revitalize your compute nodes without investing in full rack replacements.
At Ram Exchange, we understand that deploying memory across enterprise platforms like Lenovo ThinkSystem requires strict adherence to hardware architecture standards. Lenovo servers utilize sophisticated UEFI firmware validation and multi-channel memory layouts. An incorrect module type, mismatched rank count, or unbalanced channel configuration will lead to bus down-clocking, failed server discovery, or unexpected boot errors.
Hardware oversights can lead to serious operational consequences. Field studies on server hardware behavior published by USENIX demonstrate that DRAM failures remain one of the primary drivers of data center crashes, with error correction code (ECC) parity events escalating significantly when unstable or incorrectly matched modules are placed under heavy thermal loads. Taking the time to understand your server's architectural rules before upgrading prevents unneeded disruption.
This comprehensive guide covers everything you need to know before executing a Lenovo server RAM upgrade, helping you navigate compatibility requirements, choose the right memory modules, and install them safely.
Core Memory Technologies in Lenovo ThinkSystem Servers
Before you order new parts, you must understand the specific DRAM types supported by Lenovo server motherboards. Lenovo ThinkSystem and legacy System x servers rely on three main enterprise memory classes:
Registered DIMMs (RDIMMs)
RDIMMs incorporate a dedicated hardware register between the memory controller and the DRAM chips on the module. This register buffers address and command lines, which lowers electrical loading on the memory controller.
· Characteristics: Moderate latency, cost-effective acquisition, and strong performance for general enterprise workloads.
· Best Suited For: Typical virtualization hosts, file servers, web servers, and mid-tier database environments.
Load-Reduced DIMMs (LRDIMMs)
LRDIMMs take buffering further by incorporating specialized data buffers alongside the command/address register. These buffers isolate both control signals and data lines from the motherboard bus.
· Characteristics: Dramatically reduces capacitive load on the memory bus, allowing administrators to populate multiple DIMMs per channel (DPC) while maintaining rated bus frequencies.
· Best Suited For: Extreme-density virtualization farms, high-performance computing (HPC) nodes, and large in-memory databases like SAP HANA.
Three-Dimensional Stacking (3DS) RDIMMs
Contemporary Lenovo ThinkSystem platforms utilize 3DS memory, which stacks physical silicon dies vertically using Through-Silicon Vias (TSVs).
· Characteristics: Provides high capacity (up to 128GB, 256GB, or more per module) without creating excessive electrical loading.
· Best Suited For: High-tier enterprise infrastructure operating massive computational and artificial intelligence workloads.
Crucial Compatibility Rules
· Never Mix RDIMMs and LRDIMMs: Lenovo UEFI firmware will flag a fatal configuration mismatch and halt server initialization if you mix registered and load-reduced modules.
· Never Mix DDR Standards: DDR4 and DDR5 modules use different notch locations and pinouts, making them electrically and physically incompatible.
· Keep Speeds Consistent: While modern memory controllers can adjust down to the lowest common frequency, mixing fast and slow modules forces all memory down to the slowest installed speed.
Comparing Lenovo Server Generations and Memory Standards
Identifying your server model family determines the exact generation, frequency, and maximum capacity your chassis supports.
| Lenovo Server Series | Typical Processors | Memory Standard | Maximum Bus Speeds | Common Form Factors |
|---|---|---|---|---|
| ThinkSystem V1 (e.g., SR530, SR650) |
1st/2nd Gen Intel Xeon Scalable | DDR4 | 2666 / 2933 MHz | RDIMM, LRDIMM |
| ThinkSystem V2 (e.g., SR630 V2, SR650 V2) |
3rd Gen Intel Xeon Scalable | DDR4 | 3200 MHz | RDIMM, 3DS RDIMM |
| ThinkSystem V3 (e.g., SR630 V3, SR650 V3) |
4th/5th Gen Intel Xeon Scalable | DDR5 | 4800 / 5600 MHz | DDR5 RDIMM, 3DS RDIMM |
| ThinkSystem AMD (e.g., SR645, SR665 V3) |
AMD EPYC 7002 / 7003 / 9004 | DDR4 / DDR5 | 3200 to 4800+ MHz | RDIMM, 3DS RDIMM |
Balancing your memory deployment not only prevents boot errors but also protects energy efficiency. The Computer Society highlights that optimizing memory channel utilization improves data center server energy efficiency by multiple percentage points, while unoptimized channel distributions lead to wasted power and diminished throughput.
When you prepare to balance or expand your clusters, browse our inventory of verified enterprise products to source fully tested, matched modules for your exact generation.
Channel Architecture and the Importance of Balanced Population
Enterprise servers do not treat memory slots as random plug-and-play sockets. Modern Intel Xeon Scalable processors feature up to 8 memory channels per CPU, while AMD EPYC 9004 processors feature up to 12 channels per CPU.
Why Balanced Population Matters
1. Full Memory Interleaving: When you populate all channels uniformly, the CPU memory controller interleaves read and write requests across all channels concurrently. This architecture delivers 100% of available memory bandwidth.
2. Avoiding Bandwidth Penalties: If you populate only four out of eight channels on an Intel Scalable processor, memory bandwidth drops by roughly half.
3. Socket Symmetry: Always mirror the exact DIMM arrangement of CPU 1 onto CPU 2. An asymmetrical layout creates Non-Uniform Memory Access (NUMA) performance bottlenecks, leading to hypervisor latency spikes.
Step-by-Step Guide to Performing a Lenovo Server RAM Upgrade
Executing your hardware installation cleanly prevents physical damage and post-upgrade headaches.
Pre-Upgrade Preparation
· Audit Current Memory in XClarity Controller (XCC): Log in to Lenovo XCC, navigate to Inventory > Memory, and export your current DIMM part numbers, slot allocations, and speeds.
· Update System Firmware: Update UEFI and XCC firmware to the latest available releases. Updated firmware includes current Memory Reference Code (MRC), ensuring broad compatibility with higher-density modules.
· Procure Matching Modules: Ensure replacement modules match the rank profile, voltage, and architecture of your existing hardware before starting physical work.
Physical Installation Steps
1. Gracefully Power Down: Migrate virtual machines away from the host, shut down the operating system cleanly, and disconnect all power cables.
2. Use ESD Protection: Put on an anti-static wrist strap connected to an unpainted metal surface on the server rack or chassis.
3. Follow Slot Sequence Rules: Consult the chassis service label or motherboard silk-screening. Lenovo motherboard slots follow a specific alphanumeric sequence (such as 1, 2, 3, 4). Always fill the primary slots across every channel before placing modules into secondary slots.
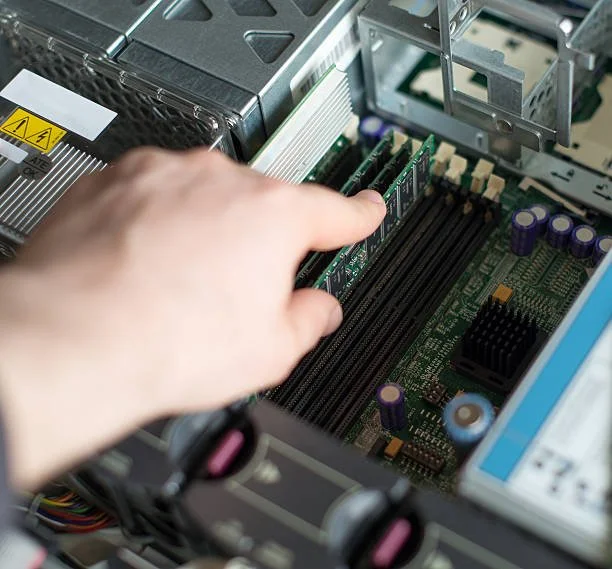
4. Seat the Modules Firmly: Open the retaining clips at both ends of the target slot. Align the module key notch with the slot key, and apply steady, even downward pressure on both top corners of the module until the retaining clips click into place. Avoid pressing the center of the module.
5. Reinstall Air Baffles: Always replace air shrouds and chassis covers before powering on. Enterprise fans depend on air baffles to force cooling airflow across the memory heatsinks.
Verification and Boot Check
Power on the server and watch the Lenovo splash screen. Access the UEFI setup or log into XCC to verify:
· All installed modules are recognized.
· Total memory capacity reflects the expected sum.
· Operating clock frequency matches your intended target.
· The system event log shows zero memory initialization faults.
Monetizing Surplus Hardware with Ram Exchange
A major server memory upgrade often leaves IT departments with surplus, lower-density DIMMs that still carry significant market value. Storing decommissioned DRAM in a storage closet leads to depreciation and waste.
| Benefit | How Ram Exchange Supports Your Infrastructure |
|---|---|
| Capital Recovery | When you upgrade your compute nodes, you can sell to us to turn older, working memory into budget credits for your project. |
| Rigorous Testing | Every module in our inventory undergoes extensive multi-point diagnostic stress testing to ensure complete reliability. |
| Comprehensive Warranty | All memory purchased through us includes a solid one-year warranty, protecting your mission-critical operations. |
| Sustainable ITAD Services | We provide certified electronics recycling and data sanitization, ensuring full compliance with environmental standards. |
Execute Your Memory Upgrade with Total Assurance
Upgrading your enterprise memory footprint remains one of the smartest, most cost-effective investments for improving data center throughput and scaling virtual workloads. By respecting channel balance, following proper slot hierarchy, and avoiding mixed module classifications, you ensure that your server runs smoothly from the moment you power it on.
If you are ready to buy Lenovo server RAM or need help verifying part numbers for an upcoming upgrade project, contact the enterprise hardware team at Ram Exchange today. We will guide you toward the right configuration for your specific server environment.
Frequently Asked Questions
Can I mix memory of different capacities in a Lenovo server?
Yes, but you must follow strict population rules. The largest capacity modules must reside in the primary slots (lowest numbered slots) of each channel, with smaller modules in secondary slots. However, to achieve maximum memory interleaving and prevent NUMA imbalance, populating all channels with identical capacities is strongly recommended.
How do I clear a disabled memory slot error in Lenovo XCC?
A disabled slot warning usually occurs when a module fails POST memory training or experiences repeated uncorrectable ECC errors. Power down the server, remove the affected module, inspect the slot for dust or debris, clean the gold contacts with isopropyl alcohol, and reseat it firmly. If the error persists, test the module in an alternate known-good slot to isolate whether the issue is the DIMM or the motherboard slot.
Will a Lenovo server RAM upgrade void my hardware warranty?
Using high-quality, fully compatible Tier-1 OEM memory modules that conform to Lenovo JEDEC and voltage specifications will not void your base server warranty. Sourcing verified modules ensures that your system operates safely within designed electrical parameters.
What happens if I populate secondary slots before primary slots?
The server UEFI will detect an unsupported memory population order during the POST discovery phase. In most cases, the server will either halt with a memory initialization error code or disable the improperly populated slots entirely.
What should I consider before I buy Lenovo server RAM?
Before purchasing, confirm your processor family, the number of memory channels per CPU, the supported memory generation (DDR4 or DDR5), your current module ranks, and whether your existing modules are RDIMMs or LRDIMMs. Sourcing from a specialized supplier guarantees that you receive fully compatible modules.