
HP DL360 Gen9 Memory Upgrade Guide: Capacity, Compatibility, and Installation
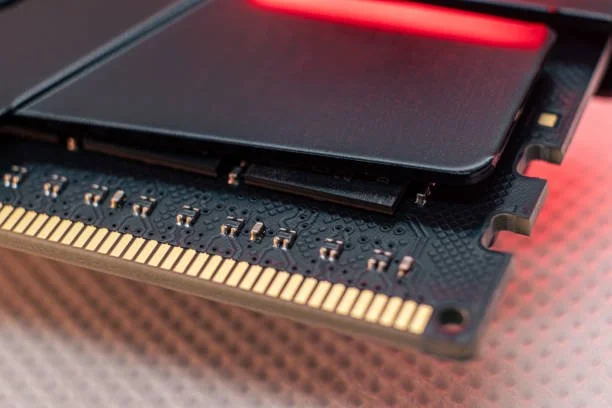
The HPE ProLiant DL360 Gen9 remains one of the most dependable 1U workhorses in enterprise datacenters, edge environments, and lab infrastructure. As virtualization densities rise and transactional workloads grow, upgrading your HP dl360 gen9 memory provides a fast, budget-friendly way to eliminate bottlenecks without replacing your compute chassis. Expanding system RAM increases host consolidation ratios, speeds up database queries, and keeps critical applications running smoothly.
Executing an effective memory expansion requires an understanding of memory channel architectures, slot sequencing guidelines, rank limitations, and DIMM compatibility. At RAM Exchange, we help IT professionals configure, source, and deploy high-reliability enterprise memory modules that deliver maximum performance and stability across all ProLiant deployments.
Architectural Overview of HP DL360 Gen9 Memory Architecture
The HPE ProLiant DL360 Gen9 features a dual-socket motherboard built around the Intel C610 series chipset, supporting the Intel Xeon E5-2600 v3 and E5-2600 v4 processor families.
Memory Channel Topologies
Channels Per Processor: 4 physical memory channels per CPU socket.
Slots Per Channel: 3 DIMM slots per channel (3 DPC).
Total DIMM Slots: 24 physical DIMM slots across a dual-processor configuration (12 slots per CPU socket).
Processor Family Impact on Memory Frequency
The generation of your installed processor dictates your maximum memory operating speed:
Intel Xeon E5-2600 v3 Series: Supports DDR4 memory up to 2133 MT/s.
Intel Xeon E5-2600 v4 Series: Supports DDR4 memory up to 2400 MT/s.
Installing 2400 MT/s modules alongside E5-2600 v3 processors works reliably, but the integrated memory controller automatically clocks the RAM down to 2133 MT/s to match processor limits.
Maximum Memory Capacity Limits: RDIMM vs. LRDIMM vs. NVDIMM
Choosing the right memory module technology directly determines your maximum gigabyte ceiling on the DL360 Gen9 platform.
Registered DIMMs (RDIMMs)
RDIMMs include an onboard register to buffer address and control signals, reducing electrical load on the integrated memory controller.
Maximum Capacity with E5-2600 v4: Up to 768GB using 24x 32GB dual-rank (2R) RDIMMs at 2400 MT/s.
Best Suited For: Standard virtualization clusters, web servers, and general business applications requiring moderate memory density at low latencies.
Load-Reduced DIMMs (LRDIMMs)
LRDIMMs buffer both control and data lines using a specialized buffer chip. This reduces electrical capacitance on the memory bus, allowing higher module densities and higher operating speeds across dense slot populations.
Maximum Capacity with E5-2600 v4: Up to 3TB using 24x 128GB octal-rank (8R) 3DS LRDIMMs.
Best Suited For: In-memory databases, large-scale hypervisor hosts, and high-performance compute nodes.
Non-Volatile DIMMs (NVDIMMs)
The DL360 Gen9 supports HPE 8GB NVDIMM modules for ultra-low-latency persistent storage write logging.
Maximum Capacity: Up to 128GB (16x 8GB NVDIMMs) supported on systems running Intel Xeon E5-2600 v4 processors.
The Essential Compatibility Rule: Never Mix DIMM Types
The DL360 Gen9 strictly prohibits mixing RDIMMs, LRDIMMs, and NVDIMMs within the same server chassis. Mixing different memory buffering technologies triggers a fatal memory initialization fault during Power-On Self-Test (POST) and halts system boot.
A comprehensive empirical study on datacenter hardware reliability reveals that over 8 percent of active enterprise memory modules experience operational faults annually, with memory subsystem issues standing as the leading cause of unexpected server reboots. Sourcing verified, high-grade ECC memory directly protects your infrastructure from unexpected downtime.
To avoid configuration errors and source verified modules, RAM Exchange collaborates directly with enterprise engineers to configure fully validated hardware packages.
Slot Population Rules and Channel Balancing on the DL360 Gen9
To unlock 100 percent of available memory bandwidth and enable full memory interleaving, administrators must populate memory slots in the exact sequence specified by HPE.
The 4-Channel Interleaving Rule
Each Intel Xeon processor on the DL360 Gen9 utilizes four independent 64-bit memory channels (Channels A, B, C, and D). Populating all four channels per socket allows the CPU to interleave memory requests across multiple physical modules simultaneously, eliminating memory access bottlenecks.
Step-by-Step Slot Population Sequence per Processor
The motherboard labels the 12 DIMM slots for each CPU numerically and color-codes the retention latches:
Populate White Slots First (Slots 1, 2, 3, 4): These represent the primary physical slot of each of the four memory channels (1 DPC). Populate these slots first to achieve maximum memory operating speed.
Populate Black Slots Second (Slots 5, 6, 7, 8): These represent the secondary slot on each channel (2 DPC). Populate these after filling all four white slots.
Populate Blue Slots Third (Slots 9, 10, 11, 12): These represent the tertiary slot on each channel (3 DPC). Populate these only when expanding to maximum 24-slot capacity.
Maintaining Dual-Socket Symmetry
In dual-processor setups, always install identical memory configurations across CPU 1 and CPU 2:
Install identical total gigabyte capacities on both CPU sockets.
Install identical module counts on both CPU sockets.
Install identical rank profiles (such as 1R, 2R, 4R, or 8R) across matching channels.
Asymmetric configurations cause Non-Uniform Memory Access (NUMA) imbalances. If CPU 1 runs out of local RAM, it must access the memory pool of CPU 2 across the QuickPath Interconnect (QPI) link, causing noticeable application latency spikes.
Understanding Operating Frequencies and Bus Downclocking
Operating speeds for HP dl360 gen9 memory vary depending on processor model, module type, and slot population density (DIMMs Per Channel).
Frequency Rules for Intel Xeon E5-2600 v4 Processors
1 DPC (White Slots Only): RDIMMs and LRDIMMs operate at full native speed of 2400 MT/s at 1.2V.
2 DPC (White + Black Slots): RDIMMs and LRDIMMs continue operating at 2400 MT/s at 1.2V.
3 DPC (White + Black + Blue Slots): Populating all three slots per channel increases total electrical loading on the bus, automatically downclocking memory operating speeds from 2400 MT/s to 1866 MT/s or 1600 MT/s.
If your primary goal is maximizing transaction speed and minimizing latency, deploy a 1 DPC or 2 DPC configuration. If your workload requires massive capacity, populating all 3 DPC provides maximum density despite the lower bus speed.
A datacenter resource optimization analysis demonstrates that physical memory accounts for more than 50 percent of total server acquisition costs. The study highlights that optimizing memory allocation eliminates systemic compute bottlenecks and recovers lost processing efficiency across large server fleets without requiring full system replacement.
To browse verified, high-performance DDR4 modules tested specifically for DL360 Gen9 rackmount servers, explore the extensive selection of RAM Exchange products.
Step-by-Step Physical Installation and Upgrade Protocol
Upgrading the physical memory on a 1U HP DL360 Gen9 requires strict adherence to electrostatic discharge (ESD) safety and thermal airflow procedures.
Step 1: Pre-Installation Audit and Firmware Verification
Document your current memory configuration via the HPE Integrated Lights-Out (iLO 4) web interface. Update your system ROM BIOS and iLO 4 firmware to the latest available versions to ensure support for modern high-density DDR4 modules and improved signal margin tolerances.
Step 2: System Shutdown and ESD Preparation
Power down the server, disconnect all redundant power supply cables, and remove the chassis cover. Attach an anti-static wrist strap to a grounded metal surface to prevent electrostatic discharge from damaging sensitive DRAM components.
Step 3: Remove the Air Baffle
Lift the transparent plastic airflow baffle straight up from the chassis. The baffle directs cooling air from the front fan array across the DIMM slots; take care not to bend or crack it during removal.
Step 4: Clear Debris and Populate DIMMs
Inspect open DIMM slots for dust, clearing them with dry compressed air if necessary. Open the white retaining latches on the designated primary slots. Align the physical keying notch on the bottom edge of the DDR4 module with the alignment post in the slot. Press down firmly on both top corners of the DIMM until the latches snap into the locked position.
Step 5: Reinstall the Air Baffle and Close Chassis
Carefully reseat the air baffle into its alignment guides. Operating a 1U DL360 Gen9 chassis without its airflow baffle creates dead air zones, causing high-density memory banks to overheat and throttle. Reinstall the top cover and reconnect power cords.
Step 6: POST Verification and Diagnostic Stress Testing
Boot the server and enter the iLO 4 interface. Confirm that the system recognizes the full physical memory capacity and verify that the Integrated Management Log (IML) reports zero initialization faults. Run comprehensive memory diagnostic tests (such as MemTest86+ or UEFI memory diagnostics) before returning the host to active production.
How RAM Exchange Delivers Value for ProLiant Upgrades
Executing hardware upgrades across enterprise fleets requires reliable supply channels, rigorous component testing, and strategic lifecycle management. RAM Exchange provides complete DRAM procurement and IT Asset Disposition (ITAD) solutions built for datacenter operators.
The RAM Exchange Quality Framework
Multi-Point Diagnostic Testing: Every module undergoes rigorous physical inspection, SPD timing verification, and stress testing under full server workloads.
Comprehensive One-Year Warranty: We back all memory products with a dependable one-year replacement warranty.
Deep Legacy and Modern Inventory: Sourcing Tier-1 compliant DDR3, DDR4, and DDR5 enterprise memory across all major form factors.
Certified ITAD Services: Providing secure hardware buyback, value recovery, and certified environmental recycling for decommissioned server parts.
Monetize Decommissioned Server Hardware
Upgrading your DL360 Gen9 memory often leaves behind working lower-capacity DIMMs (such as 8GB or 16GB modules). Through our specialized ITAD buyback programs, we help IT managers turn surplus hardware into working capital. If your team is upgrading memory across server clusters, sell to us to monetize excess inventory, offset expansion expenses, and support certified environmental recycling.
Pre-Upgrade Planning Checklist for IT Administrators
Follow this practical checklist when planning an hp dl360 gen9 memory upgrade:
Check Installed CPU Models: Verify whether your server runs Intel Xeon E5-2600 v3 (2133 MT/s limit) or E5-2600 v4 (2400 MT/s limit) processors.
Select a Single Module Architecture: Choose either RDIMMs (up to 768GB) or LRDIMMs (up to 3TB) without mixing formats.
Ensure Uniform Module Specs: Match operating voltages (1.2V DDR4), speed ratings, and CAS latencies across all channels.
Order Symmetrical Channel Sets: Purchase modules in balanced multiples (such as sets of 4, 8, 16, or 24) to populate channels evenly across both CPU sockets.
Follow Proper Slot Sequencing: Populate white primary slots first, black secondary slots second, and blue tertiary slots last.
Verify via HPE iLO 4: Confirm total recognized memory capacity and check the IML event log for correctable error telemetry.
Conclusion: Maximize Your DL360 Gen9 Performance and Longevity
Upgrading your hp dl360 gen9 memory represents one of the most reliable and cost-effective ways to extend hardware life, lower application latency, and support demanding virtualized workloads. By respecting channel balancing rules, selecting the right DIMM technology, and following strict slot population guidelines, you ensure exceptional stability and peak compute performance across your enterprise infrastructure.
If your team is planning an infrastructure expansion, sourcing verified DDR4 memory, or configuring high-density ProLiant clusters, contact the technical hardware specialists at RAM Exchange today.
Frequently Asked Questions
Can I mix DDR3 and DDR4 memory in an HP DL360 Gen9?
No. The HP DL360 Gen9 supports DDR4 memory exclusively. DDR3 and DDR4 modules use different pin layouts, physical keying notches, and operating voltages (1.5V/1.35V for DDR3 versus 1.2V for DDR4), making them physically and electrically incompatible.
What happens if I install memory in black slots before white slots on a DL360 Gen9?
Installing modules out of sequence disrupts memory channel initialization. The server may fail to complete its POST routines, generate memory configuration errors in the iLO 4 log, or fail to allocate the modules installed in the secondary slots. Always populate all white primary slots first.
Can I use standard non-ECC desktop DDR4 RAM in a DL360 Gen9 server?
No. The HP DL360 Gen9 requires enterprise-grade ECC memory (RDIMM or LRDIMM). Unbuffered non-ECC desktop RAM lacks the parity architecture required by the Intel C610 chipset and will prevent the server from completing POST.
Why is my DL360 Gen9 running memory at 2133 MT/s instead of the rated 2400 MT/s?
Your memory operates at 2133 MT/s if your server runs Intel Xeon E5-2600 v3 processors, which have a maximum memory controller speed of 2133 MT/s. Upgrading to Intel Xeon E5-2600 v4 processors allows compatible modules to operate at their full 2400 MT/s rating.